

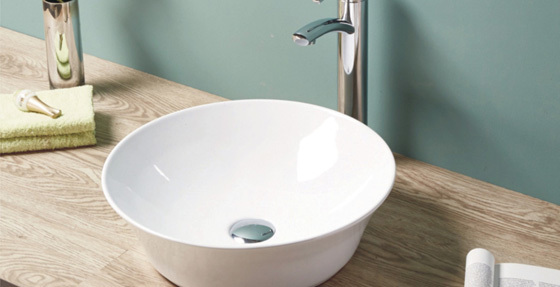



How to Install a Large Ceramic Basin in 5 Easy Steps: A Comprehensive Guide for DIY Enthusiasts
Release time:
2023-12-26
Table of Contents: 1. Introduction 2. Step 1: Gathering the Tools and Materials 3. Step 2: Preparing the Installation Area 4. Step 3: Positioning the Ceramic Basin 5. Step 4: Connecting the Plumbing 6. Step 5: Securing the Basin Firmly 7. FAQs 8. Conclusion 1. Introduction Installing a large ceramic basin can be a rewarding DIY project that adds both functionality and aesthetic appeal to your bath

1. Introduction
2. Step 1: Gathering the Tools and Materials
3. Step 2: Preparing the Installation Area
4. Step 3: Positioning the Ceramic Basin
5. Step 4: Connecting the Plumbing
6. Step 5: Securing the Basin Firmly
7. FAQs
8. Conclusion
1. Introduction
Installing a large ceramic basin can be a rewarding DIY project that adds both functionality and aesthetic appeal to your bathroom. By following the step-by-step instructions in this guide, you will be able to accomplish this task effortlessly and enjoy the benefits of a beautifully installed basin.
2. Step 1: Gathering the Tools and Materials
Before you begin the installation process, it is essential to gather all the necessary tools and materials. This includes a wrench, screwdriver, silicone sealant, plumber's tape, adjustable wrench, level, pencil, and safety goggles. Having these items readily available will ensure a smooth installation process.
3. Step 2: Preparing the Installation Area
Prepare the installation area by removing any existing fixtures or debris. Ensure that the area is clean and dry before proceeding. Measure and mark the desired location of the basin on the wall, considering factors such as height and distance from other fixtures.
4. Step 3: Positioning the Ceramic Basin
Once the installation area is prepared, position the ceramic basin on the marked spot. Use a level to ensure the basin is perfectly leveled. This step is crucial to prevent any future issues related to water drainage or stability.
5. Step 4: Connecting the Plumbing
Connect the plumbing by attaching the water supply lines to the corresponding valves. Use plumber's tape to secure the connections and prevent leaks. Ensure that all connections are tight and properly aligned.
6. Step 5: Securing the Basin Firmly
To ensure the ceramic basin remains secure and stable, it is important to secure it firmly to the wall. Use a pencil to mark the mounting holes on the wall, and drill pilot holes accordingly. Insert wall anchors into the pilot holes and then attach the basin to the wall using screws and brackets. Double-check the alignment and stability of the basin before proceeding.
7. FAQs
Q1: Can I install a large ceramic basin by myself?
Q2: What type of silicone sealant should I use for sealing the basin?
Q3: How long does it take to complete the installation process?
Q4: Can I install a large ceramic basin on any type of wall material?
Q5: What precautions should I take during the installation process?
8. Conclusion
Installing a large ceramic basin in your bathroom can elevate its overall appearance and functionality. By following the five easy steps outlined in this guide, you can successfully complete this DIY project and enjoy the benefits of a professionally installed basin. Remember to gather all the necessary tools and materials, prepare the installation area, position the basin correctly, connect the plumbing securely, and firmly secure the basin to the wall. With these steps, you can transform your bathroom into a stylish and functional space.
Related news
CONTACT US
Address: Deng Tang Zhen San Xiang Dong Liao Cun, Chao'an District, Chaozhou City, Guangdong Province
Address: No.14, Changmeiguayuan Road, Fengxi, Chaozhou, Guangdong
Sanxiang Branch Phone: 86-0768-6822162
Sanxiang Branch Fax: 86-0768-6822163