

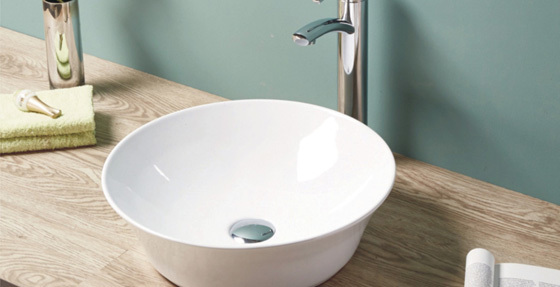



Step-by-Step Guide: How to Properly Install a Hand Wash Basin in Your Bathroom
Release time:
2023-12-30
Table of Contents: 1. Introduction 2. Tools and Materials Needed 3. Preparing for Installation 4. Installing the Hand Wash Basin 4.1. Mounting the Basin on the Wall 4.2. Connecting the Water Supply 4.3. Installing the Drainage System 5. Testing and Finishing Touches 6. Frequently Asked Questions (FAQs) 6.1. How long does it take to install a hand wash basin? 6.2. Can I install a han

1. Introduction
2. Tools and Materials Needed
3. Preparing for Installation
4. Installing the Hand Wash Basin
4.1. Mounting the Basin on the Wall
4.2. Connecting the Water Supply
4.3. Installing the Drainage System
5. Testing and Finishing Touches
6. Frequently Asked Questions (FAQs)
6.1. How long does it take to install a hand wash basin?
6.2. Can I install a hand wash basin without professional help?
6.3. What type of basin is best for small bathrooms?
6.4. How do I maintain the cleanliness of my hand wash basin?
6.5. Can I replace an old basin with a new one without changing the plumbing?
7. Conclusion
1. Introduction
Installing a hand wash basin in your bathroom not only adds functionality but also enhances the overall aesthetic appeal of the space. Whether you are renovating your bathroom or starting from scratch, understanding the proper installation process is crucial for a successful outcome.
2. Tools and Materials Needed
Before you begin the installation, gather the necessary tools and materials to ensure a smooth process. You will need:
- Hand wash basin
- Mounting brackets or screws
- Adjustable wrench
- Screwdriver
- Teflon tape
- Plumbing sealant
- Hacksaw (if necessary)
- Level
- Measuring tape
- Pencil
- Bucket
- Towels
3. Preparing for Installation
Before installing the hand wash basin, make sure to turn off the water supply to avoid any leaks or accidents. Also, clear the space where the basin will be installed and ensure that the wall is clean and dry.
4. Installing the Hand Wash Basin
4.1. Mounting the Basin on the Wall
1. Start by positioning the basin against the wall at the desired height and mark the mounting holes on the wall using a pencil.
2. Using a drill, create holes at the marked positions for the mounting brackets or screws.
3. Insert the mounting brackets or screws into the holes and secure them tightly.
4. Place the basin onto the brackets or screws, ensuring it is level. Adjust as necessary.
5. Double-check the stability and ensure the basin is securely attached to the wall.
4.2. Connecting the Water Supply
1. Begin by connecting the water supply lines to the basin. If necessary, use Teflon tape to ensure a watertight seal.
2. Use an adjustable wrench to tighten the connections, but be careful not to overtighten and damage the fittings.
3. Turn on the water supply and check for any leaks. If leaks are detected, tighten the connections further or apply plumbing sealant.
4.3. Installing the Drainage System
1. Install the drain pipe by connecting it to the bottom of the basin. Ensure a proper fit and use plumbing sealant if needed.
2. Use a hacksaw to adjust the length of the pipe if necessary, ensuring it aligns with the existing plumbing.
3. Connect the drain pipe to the main drainage system, making sure it is securely fastened.
4. Test the drainage system by pouring water into the basin and checking for any leaks. Adjust connections if necessary.
5. Testing and Finishing Touches
After completing the installation, it is essential to test the functionality of the hand wash basin. Turn on the water supply and check for any leaks or drainage issues. Once satisfied, give the basin a thorough cleaning and add any finishing touches to enhance its appearance.
6. Frequently Asked Questions (FAQs)
6.1. How long does it take to install a hand wash basin?
The installation time can vary depending on the complexity of the plumbing and the skill level of the installer. On average, it may take a few hours to complete the installation.
6.2. Can I install a hand wash basin without professional help?
Yes, with proper guidance and basic plumbing knowledge, it is possible to install a hand wash basin without professional help. However, if you are unsure or uncomfortable with the process, it is recommended to seek assistance from a professional plumber.
6.3. What type of basin is best for small bathrooms?
For small bathrooms, wall-mounted or corner basins are ideal as they save space and provide a visually appealing solution. Consider the available space and layout of your bathroom when choosing a basin.
6.4. How do I maintain the cleanliness of my hand wash basin?
Regular cleaning is essential to maintain the cleanliness of your hand wash basin. Use mild soap or cleaning agents suitable for the material of your basin. Avoid abrasive cleaners or scrubbing pads that may damage the surface.
6.5. Can I replace an old basin with a new one without changing the plumbing?
In some cases, it is possible to replace an old basin with a new one without changing the plumbing. However, this depends on the compatibility of the new basin with the existing connections. It is recommended to consult a professional plumber to assess the situation and provide guidance.
7. Conclusion
Installing a hand wash basin in your bathroom is a rewarding project that can transform the space while adding functionality. By following the step-by-step guide provided, you can ensure a proper installation process and enjoy the benefits of a well-installed hand wash basin. Remember to take your time, double-check each step, and seek professional assistance when needed. With careful planning and execution, your bathroom will soon boast a beautiful and functional hand wash basin.
Related news
CONTACT US
Address: Deng Tang Zhen San Xiang Dong Liao Cun, Chao'an District, Chaozhou City, Guangdong Province
Address: No.14, Changmeiguayuan Road, Fengxi, Chaozhou, Guangdong
Sanxiang Branch Phone: 86-0768-6822162
Sanxiang Branch Fax: 86-0768-6822163