




Transforming Your Bathroom with a Thin Edge Basin: A Step-by-Step Installation Guide
Release time:
2023-12-31
Table of Contents: 1. Introduction 2. What is a Thin Edge Basin? 3. Why Choose a Thin Edge Basin? 4. Tools and Materials Needed for Installation 5. Step 1: Preparing for Installation 6. Step 2: Removing the Old Basin 7. Step 3: Preparing the New Thin Edge Basin 8. Step 4: Installing the Thin Edge Basin 9. Step 5: Connecting the Plumbing 10. Step 6: Finishing Touches and Cleaning 11. FAQs 12. Concl

1. Introduction
2. What is a Thin Edge Basin?
3. Why Choose a Thin Edge Basin?
4. Tools and Materials Needed for Installation
5. Step 1: Preparing for Installation
6. Step 2: Removing the Old Basin
7. Step 3: Preparing the New Thin Edge Basin
8. Step 4: Installing the Thin Edge Basin
9. Step 5: Connecting the Plumbing
10. Step 6: Finishing Touches and Cleaning
11. FAQs
12. Conclusion
1. Introduction
Welcome to our comprehensive guide on how to transform your bathroom with a thin edge basin. In this article, we will provide you with detailed instructions on installing this modern and stylish fixture. Follow our step-by-step guide to achieve a bathroom upgrade that combines elegance and functionality seamlessly.
2. What is a Thin Edge Basin?
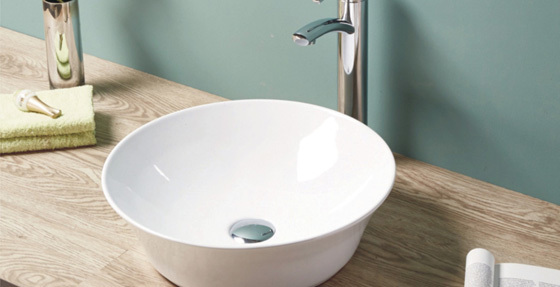
A thin edge basin is a type of bathroom sink characterized by its sleek design and slim profile. Unlike traditional basins with bulky edges, a thin edge basin offers a more minimalist and contemporary look. It provides a seamless transition between the countertop and the sink, creating a visually appealing focal point in your bathroom.
3. Why Choose a Thin Edge Basin?
There are several reasons why a thin edge basin is a popular choice for bathroom renovations. Firstly, its minimalist design enhances the overall aesthetics of your bathroom, creating a modern and sophisticated atmosphere. Additionally, the sleek edges make cleaning easier, as there are no hard-to-reach crevices for dirt and grime to accumulate. Lastly, thin edge basins are available in a variety of materials and finishes, allowing you to personalize your bathroom according to your style preferences.
4. Tools and Materials Needed for Installation
Before starting the installation process, gather the necessary tools and materials to ensure a smooth and efficient process. You will need:
- Thin edge basin
- Adjustable wrench
- Screwdriver
- Plumbers tape
- Silicone adhesive
- Bucket
- Towels
- Level
- Pencil
- Measuring tape
5. Step 1: Preparing for Installation
Before installing the thin edge basin, it is crucial to prepare the space and ensure all necessary measurements are taken. Measure the dimensions of the countertop and the existing basin to determine if any modifications are needed. Turn off the water supply to the bathroom and disconnect the plumbing connections.
6. Step 2: Removing the Old Basin
Carefully remove the old basin by loosening the nuts securing it to the countertop. Use an adjustable wrench or screwdriver to disconnect the water supply lines and drain pipe. Place towels or a bucket underneath to catch any water or debris that may spill during the removal process.
7. Step 3: Preparing the New Thin Edge Basin
Before installing the new basin, check if any modifications are required to fit it into the existing countertop. Mark the dimensions using a pencil and cut out any necessary areas using a jigsaw or appropriate tools. Ensure the edges are smooth and clean any debris from the countertop.
8. Step 4: Installing the Thin Edge Basin
Apply a thin layer of silicone adhesive around the edges of the basin to create a watertight seal. Carefully lower the basin into the countertop cutout and press it firmly to secure it in place. Use a level to ensure it is perfectly horizontal. Wipe away any excess adhesive with a damp cloth.
9. Step 5: Connecting the Plumbing
Reconnect the water supply lines and drain pipe to the new basin. Wrap plumbers tape around the threaded connections to prevent leaks. Tighten the nuts using an adjustable wrench or screwdriver, ensuring they are secure but not overly tightened. Turn on the water supply and check for any leaks.
10. Step 6: Finishing Touches and Cleaning
Once the plumbing connections are secure, clean the basin and countertop thoroughly to remove any adhesive residue or debris. Use a non-abrasive cleaner and a soft cloth to avoid scratching the surface. Polish the basin to achieve a flawless finish that complements your bathroom's new look.
11. FAQs
Q: Can I install a thin edge basin on any countertop material?
A: Thin edge basins can be installed on various countertop materials such as granite, quartz, marble, and laminate. However, it is essential to ensure that the countertop can support the weight of the basin and that any necessary modifications are made to accommodate the new fixture.
Q: How do I clean and maintain a thin edge basin?
A: Cleaning a thin edge basin is relatively simple. Use a mild, non-abrasive cleaner and a soft cloth to wipe away any dirt or stains. Avoid using harsh chemicals or abrasive materials that could damage the surface. Regularly clean and dry the basin to prevent the buildup of soap scum or mineral deposits.
Q: Can I install a thin edge basin myself, or should I hire a professional?
A: While installing a thin edge basin can be a DIY project, it is crucial to have basic plumbing knowledge and the necessary tools. If you are unsure or uncomfortable with the installation process, it is recommended to hire a professional plumber to ensure a proper and secure installation.
Q: Are thin edge basins available in various sizes and styles?
A: Yes, thin edge basins come in a wide range of sizes and styles to suit different bathroom designs and preferences. Whether you prefer a rectangular, oval, or round basin, there is a thin edge option available to fulfill your aesthetic requirements.
Q: Can a thin edge basin be installed in a small bathroom?
A: Absolutely! Thin edge basins are an excellent choice for small bathrooms as they create a sense of spaciousness and modernity. The sleek design minimizes visual clutter, making the bathroom appear larger and more open.
12. Conclusion
Transforming your bathroom with a thin edge basin is a fantastic way to elevate its style and functionality. By following our step-by-step installation guide, you can achieve a sleek and modern look while enjoying the benefits of a minimalist design. Remember to gather the necessary tools, prepare the space, and take precise measurements before embarking on the installation process. With proper care and maintenance, your new thin edge basin will enhance your bathroom for years to come.
Related news
CONTACT US
Address: Deng Tang Zhen San Xiang Dong Liao Cun, Chao'an District, Chaozhou City, Guangdong Province
Address: No.14, Changmeiguayuan Road, Fengxi, Chaozhou, Guangdong
Sanxiang Branch Phone: 86-0768-6822162
Sanxiang Branch Fax: 86-0768-6822163