

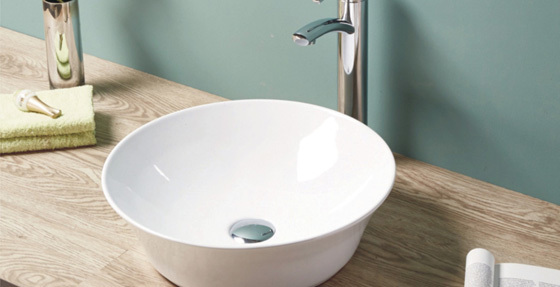



A Comprehensive Guide to Installing and Maintaining a Cabinet Basin in Your Bathroom
Release time:
2024-01-03
Table of Contents 1. Introduction 2. Choosing the Perfect Cabinet Basin for Your Bathroom 3. Preparing for Installation 4. Step-by-Step Guide to Installing a Cabinet Basin 4.1. Removing the Old Basin (If Applicable) 4.2. Measuring and Marking the Placement 4.3. Assembling the Cabinet Basin 4.4. Connecting the Plumbing 4.5. Securing the Basin to the Wall 4.6. Sealing and Finishing

1. Introduction
2. Choosing the Perfect Cabinet Basin for Your Bathroom
3. Preparing for Installation
4. Step-by-Step Guide to Installing a Cabinet Basin
4.1. Removing the Old Basin (If Applicable)
4.2. Measuring and Marking the Placement
4.3. Assembling the Cabinet Basin
4.4. Connecting the Plumbing
4.5. Securing the Basin to the Wall
4.6. Sealing and Finishing Touches
5. Maintaining and Cleaning Your Cabinet Basin
5.1. Regular Cleaning Tips
5.2. Dealing with Stains and Scratches
5.3. Preventative Maintenance
6. Frequently Asked Questions (FAQs)
6.1. How long does it take to install a cabinet basin?
6.2. Can I install a cabinet basin myself or do I need professional help?
6.3. What materials do I need for installation?
6.4. How often should I clean my cabinet basin?
6.5. Can I use abrasive cleaners on my cabinet basin?
7. Conclusion
1. Introduction
Installing a cabinet basin in your bathroom can not only enhance its aesthetic appeal but also provide useful storage space. This guide will walk you through the process of choosing the perfect cabinet basin for your bathroom, preparing for installation, and maintaining it to ensure its longevity.
2. Choosing the Perfect Cabinet Basin for Your Bathroom
When selecting a cabinet basin, consider factors such as the size of your bathroom, your personal style preferences, and the functionality you require. Whether you opt for a freestanding or wall-mounted cabinet basin, ensure that it suits your bathroom's overall design and complements other fixtures.
3. Preparing for Installation
Before you begin the installation process, gather all the necessary tools and materials. Ensure that you have measured the space accurately, checked the plumbing connections, and cleared the area for a smooth installation process.
4. Step-by-Step Guide to Installing a Cabinet Basin
4.1. Removing the Old Basin (If Applicable)
If you are replacing an existing basin, start by turning off the water supply and disconnecting the plumbing connections. Carefully remove the old basin, taking caution not to damage the surrounding tiles or walls.
4.2. Measuring and Marking the Placement
Using a measuring tape, determine the correct placement of the cabinet basin on the wall and mark it accordingly. Ensure that the basin is centered and at a comfortable height for users.
4.3. Assembling the Cabinet Basin
Follow the manufacturer's instructions to assemble the cabinet basin. This may involve attaching the basin to the cabinet and securing any additional components such as drawers or shelves.
4.4. Connecting the Plumbing
Carefully connect the plumbing components, including the water supply lines and drainpipe, ensuring a secure and leak-free connection. If necessary, seek professional assistance to ensure proper plumbing installation.
4.5. Securing the Basin to the Wall
Using appropriate wall anchors and screws, secure the cabinet basin to the wall. This step is crucial to ensure the stability and safety of the basin during use.
4.6. Sealing and Finishing Touches
Apply a waterproof sealant around the edges of the basin to prevent water damage. Additionally, make sure to clean up any excess sealant or debris for a polished finish.
5. Maintaining and Cleaning Your Cabinet Basin
5.1. Regular Cleaning Tips
To keep your cabinet basin looking its best, regularly clean it with a mild, non-abrasive cleaner and a soft cloth. Avoid using harsh chemicals or rough scrub brushes that could damage the basin's surface.
5.2. Dealing with Stains and Scratches
In case of stubborn stains or minor scratches, use gentle cleaning solutions or specialized products recommended by the manufacturer. Always test any cleaning product on a small, inconspicuous area before applying it to the entire surface.
5.3. Preventative Maintenance
Preventative maintenance is key to prolonging the life of your cabinet basin. Avoid placing heavy or sharp objects on the basin, as they can cause damage. Additionally, regularly check for any loose or damaged components and address them promptly.
6. Frequently Asked Questions (FAQs)
6.1. How long does it take to install a cabinet basin?
The installation time can vary depending on your experience and the complexity of the installation. On average, it may take a few hours to complete the installation process.
6.2. Can I install a cabinet basin myself or do I need professional help?
With the right tools and knowledge, it is possible to install a cabinet basin yourself. However, if you are unsure or uncomfortable with the process, it is recommended to seek professional assistance to ensure a proper installation.
6.3. What materials do I need for installation?
Common materials required for installation include a cabinet basin, plumbing components, sealant, screws, and wall anchors. The specific materials needed may vary depending on the type and design of the cabinet basin.
6.4. How often should I clean my cabinet basin?
Regular cleaning is essential to maintain the hygiene and appearance of your cabinet basin. Aim to clean it at least once a week or as needed, depending on usage and any visible dirt or stains.
6.5. Can I use abrasive cleaners on my cabinet basin?
Avoid using abrasive cleaners or harsh chemicals on your cabinet basin, as they can scratch or damage the surface. Stick to mild, non-abrasive cleaners and soft cloths for regular cleaning.
7. Conclusion
Installing and maintaining a cabinet basin in your bathroom can significantly enhance its functionality and visual appeal. By following the step-by-step installation guide and adopting regular maintenance practices, you can enjoy a stylish and well-maintained cabinet basin for years to come. Remember to choose a basin that suits your preferences and bathroom design, and always prioritize proper installation and care for optimal results.
Related news
CONTACT US
Address: Deng Tang Zhen San Xiang Dong Liao Cun, Chao'an District, Chaozhou City, Guangdong Province
Address: No.14, Changmeiguayuan Road, Fengxi, Chaozhou, Guangdong
Sanxiang Branch Phone: 86-0768-6822162
Sanxiang Branch Fax: 86-0768-6822163